
What is Vertical Gardening?
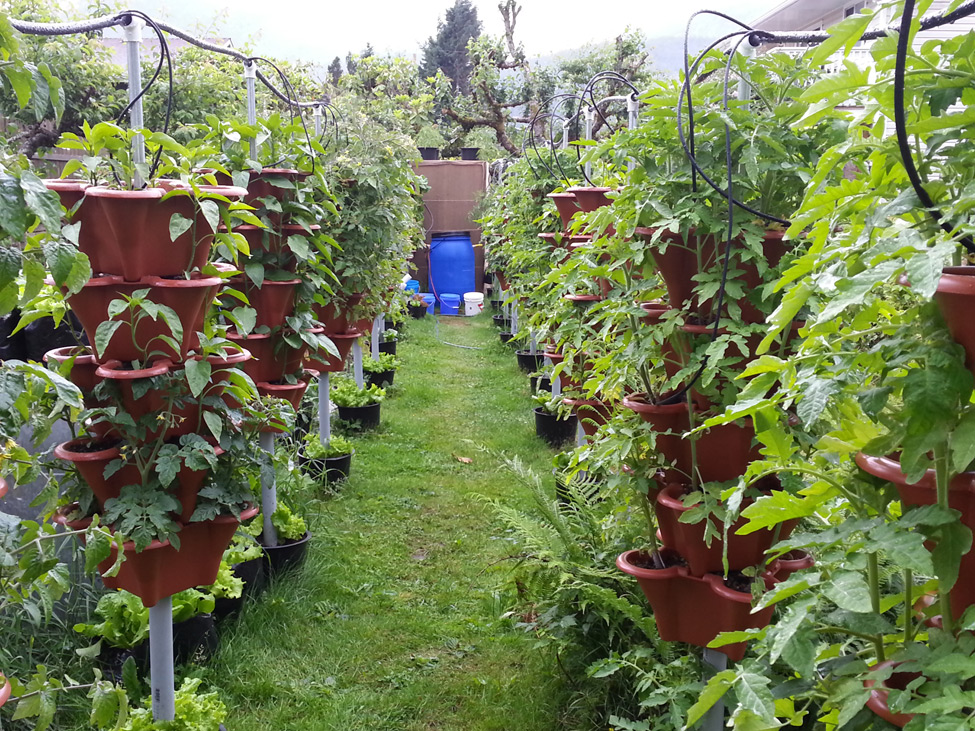
After years of gardening and hydroponic research, my research has led to running a vertical gardening system using stacked pots. Although it is not the perfect method for all plants types, I have found it to be a best ‘one system fits all approach’.
In addition to its functionality and low maintenance, it just has that ‘look’. When they say ‘beauty is in the eye of the beholder’, I have yet to see a more elegant veggie garden system and many friends, family and acquaintances tend to agree.
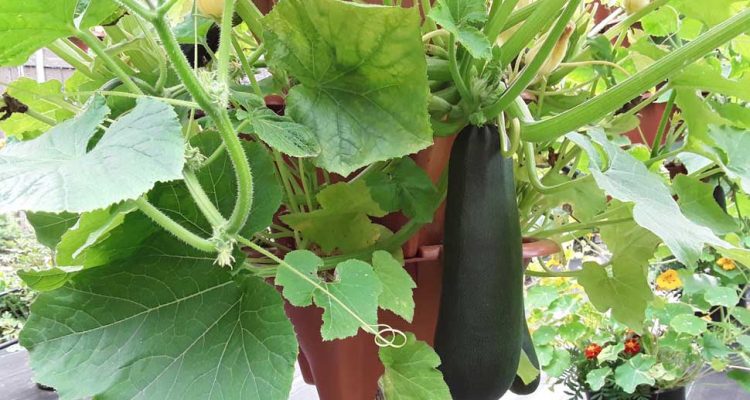
Since our favorite plants includes strawberries, lettuce, tomatoes, peppers, jalapenos, cucumbers, we grew many different types of these particular veggies.
The system itself was expensive a little time consuming to build, but, we knew the results of food would way outgain the costs of production.
While browsing for the ultimate system, we based a lot of our choices from spin-offs from the book ‘Hydroponic Food Production’ for which many vertical farmers from this 1995 publication would use grow bags or pvc for vertical systems.
The pvc systems are simple and work fine, but they do lack the elegance and ease of changing pots from tier to tier. Thus, the stacked pots, although the most costly method, was the one that was right for us.
Going a little further into details, we tried two American pot manufacturers and again, one just seemed right. Years later, the pots are holding up and his focus on quality, environment and personal integrity left us satisfied with this decision.
How It All Started
We made the decision that stacked pots was the way to go because they have had success in many parts of the world, and they would hold a medium that would hold moisture. Worldwide, any medium could really be used.
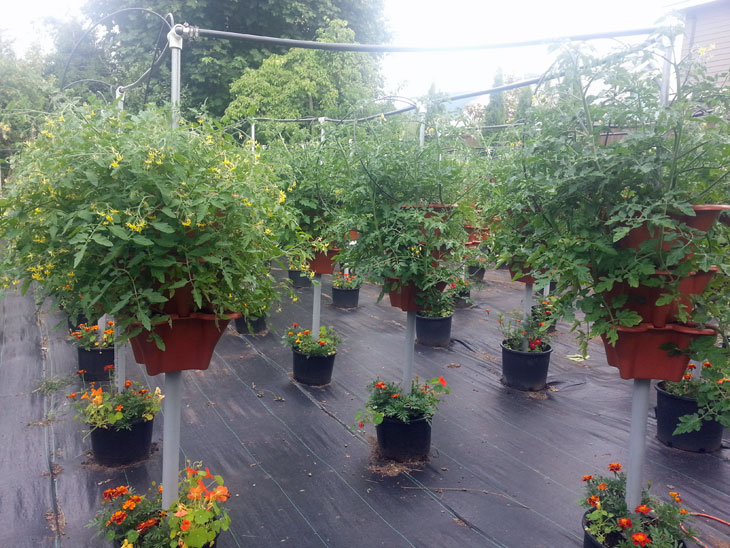
The pots that we bought could be stacked 2-8 pots high and could be spaced every 4 foot center per row. In addition, each row is staggered to receive the most light. Managing these pots was very easy without bending over. This was huge since none of us liked watering by hand and kneeling down and bending over in a dirt garden…yuck.
After initial construction, we had the option to recirculate nutrient, or drain it into bottom pots with flowers that attract bees. We chose the latter due to less chance of nutrient disease from all plants sharing one solution and the costs. In fact, the costs to recirculate would have been too excessive compared to a couple of bucks of extra food costs per year and a huge amount of extra work.
In addition to that, it is also another level of potential problems like leaks, rodent and bear issues, especially since the recirculation would be near ground level.
How To Set Up A Vertical Garden
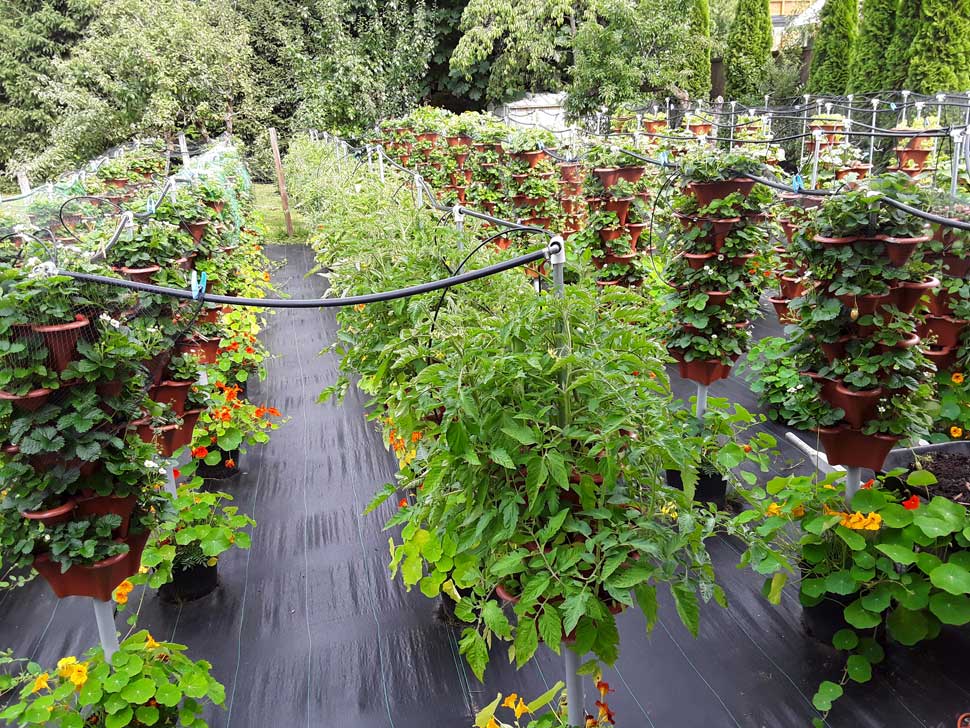
At the bottom of the system are 3-5 gallon pots with the same medium. Obviously, the 5-gallon ones produce huge flowers, like 4-foot marigolds and 6-foot Nasturtium vines. In addition to flowers, lettuce and onions grew well in the bottom too and so would almost anything else.
To set up the pots, we stacked pots over 8-foot lengths of ¾-inch conduit pipe. We pounded that pipe 2-feet underground using a fence post pounder.
Once the pipe was in place, we drilled a hole in the bottom of the 3-5 gal pots using a holesaw and placed it over the pipe. After that, we put in 18-24 inch lengths of 1.5 inch pvc that went over the conduit tubing and reached the bottom of the bucket. Now, the medium could is added to the bottom container.
After that, the quad pots with medium are placed over the conduit. These pots have ¾-inch irrigation pvc spacers placed over the pipe to reduce stress on each pot. They can be cut with a pipe cutter or chop saw. The top pot did not need a spacer.
Once the pots are set up, the feeder lines are added. Although we could have used ¾-inch poly water potable grade pipe, we chose ½-inch as it was enough and much cheaper.
The pipe was a single line that started from the pump and had less than 4-foot head. Head means the height the pump had to lift water to the feeder line. Between the pump and feeder lines is a filter that is of high importance so that the drippers do not clog.
So very simple here. The main irrigation header line travels to an end of the system and is end capped. It is held in place by ¾-inch pvc Tees at the top of the conduit pipe. Above each stack of pots are individual drip lines that run to the pots. They have drippers in their ends.
The drip lines are easy to add. We just use a line punch to make a hole, add a barbed fitting, connect the 1/4-inch individual feeder line, add a dripper to the end and secure it with a stake, zap strap, or piece of strapping with a hole drilled in it.
The amount of drip lines varied per tier as some plants like tomatoes are heavier consumers of water than the others like lettuce. For example, tomatoes may have 1 dripper per pot, while lettuce has 2 drippers per 5-pot stack.
Since each pot would house 4 plants, a tier with 3 pots of tomatoes would house 12 plants while 24 lettuce plants could be on a 6-pot stack.
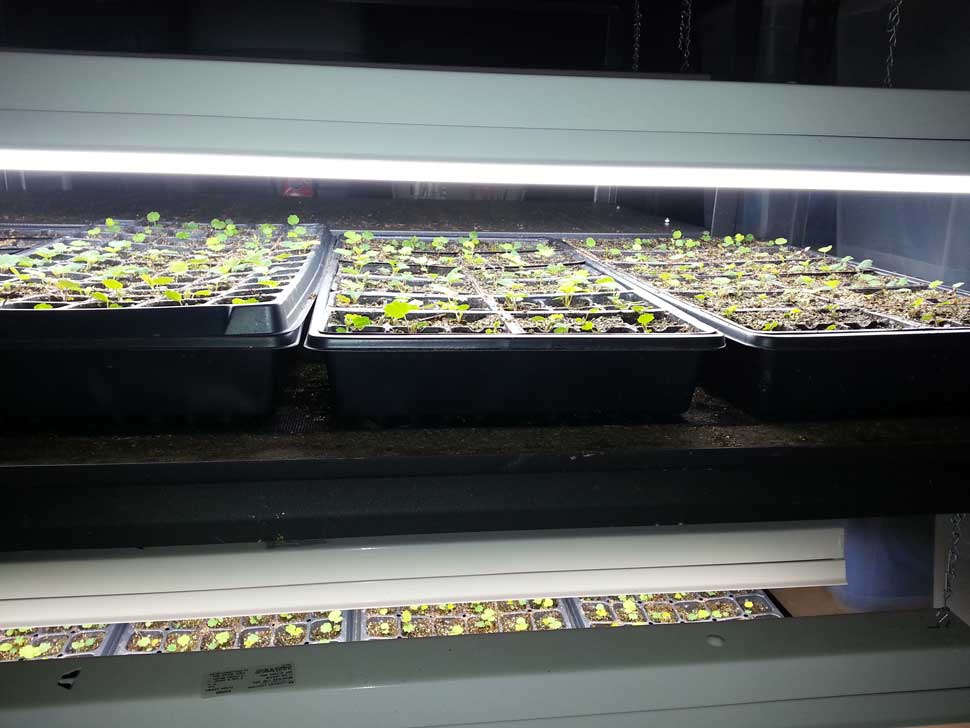
Plants are expensive. Therefore, we bought our seeds early and started them under daylight led lights from Home Depot. They are cheap and do the job for all seedlings. In fact, a single 2×4 shelf with lights, timer, nursery flats, timer, power bar electricity and seeds cost about CAD$610 and that could start almost 1000 plants at a time.
Feeding The Plants
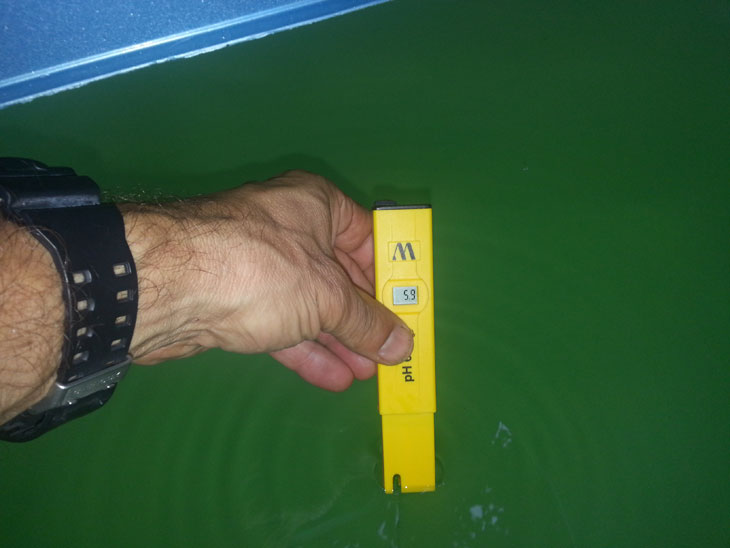
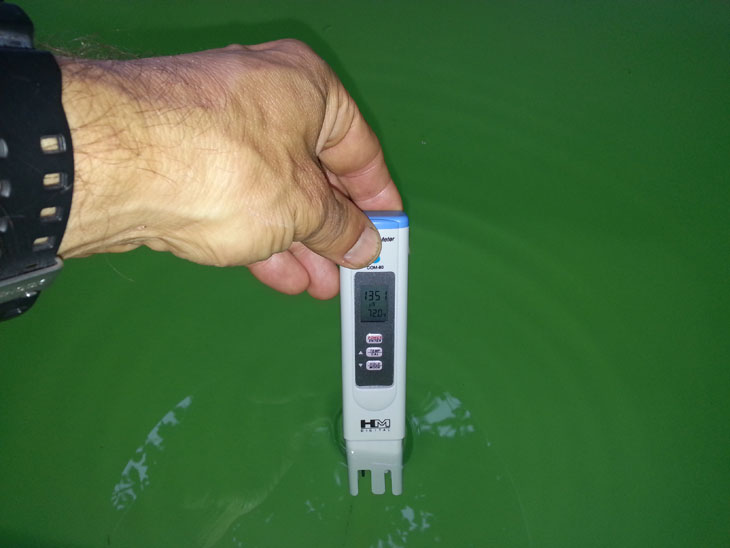
Feeding is not that scientific because as a general rule you can never overfeed in the hydro system, but only underfeed or underwater. Since the system is top-feeding, it feeds and flushes a little each time and the small pots help ensure plants eat rather than create salt build up. This is something we often check as we our goal is pure, good food with ideal nutrients and no toxicity. And as is most often the case, we flush each week and the runoff will often read near 0 ppm on the meter, meaning that the plants are eating and not leaving leftovers.
Sometimes during the season, we need to add the odd feeder line to accommodate very heavy eaters. As far as feeding goes, we feed near 1300ppm which is fine for all round growing. Lettuce can thrive in that, but a separate system near 400ppm is better and less wasteful.
Also, we noted that if each pot does not get it own feeder line, the level above from which is gets runoff can be significantly nutrient poor. For example, on a 5-pot tier of tomatoes, we could have 1350ppm on top and 325ppm leaving the bottom pot.
Too keeps things safe for summer feeding, we could add two drippers at the top pot and a dripper on every tier.
Monitoring The Season
If we can understand one concept, it is this. Plants will need more food and water as the peak summer season gets closer. For example, feeding could start in May at once a day, then eventually become 3-4 times a day in the hot July sun.
With feeding, no matter what time of year, they need food in morning and should not go to bed dry. In May, that could be a morning only feed and in July a 5 am and 7 pm sunset meal with a couple more in between.
There are cheap hydro fertilizers on the market that are cheap; such as Plant Prod Hydro. One step further, we made our own based on our 2005-ish formula and our costs to operate a 2500 plant garden are under $100 / year. That cost is quite good as the food quality for pesticide free hydroponic produce would normally be out of our budget, but, as only a labor of love is involved, the cost is almost non-existent.
When building such a garden, the reservoir size is critical. For a small garden, a 55-gallon drum will do and for a 2500 plant garden we use a 250 gallon drum that had Maple syrup. When that becomes defunct, we can easily connect it to another via the drain connections.
As far as costs go, a used 55 gallon drums costs about $10.
Plant Care
Growing many varieties of vegetable plants can be a little challenging because some plants or strains like leaf lettuce grew well with little or no care, but plants like tomatoes needed to be trained to grow downwards and peppers needed to be staked to grow upwards and protected from animal eaters.
On a more micro level, Jalapenos did not need excessive staking like sweet bell peppers and most animals did not eat much of them, just the odd bite here and there.
To go one step further, we can setup a motion detected night cam. Cameras like Foscam have FTP and more which make it easy to watch via an app and send pictures to a home pc, memory card or web server.
The most time consuming labor was peppers. To cut down on maintenance, tying biodegradable jute around the stems before they are too large works great and keeps them upright.
Asides from veggies, we decided to try our luck with one of the originating plants in a system like this…strawberries.
When we started strawberries, the seed supplier said we would be lucky for fruit in first year, even those seeds started in January. However, they were off to such a strong start and the hydro system allowed for plentiful fruit.
As a test, we planted some in a dirt garden with over 50% compost. The dirt patch did not produce berries.
Not only did they grow well, they were easy to care for and mass propagate. For someone wanting to be a strawberry wine farmer or producer, this potential looked good. From a homemade cost standpoint, one tier costs under $100 to build and plant. Each tier could easily produce enough berries for 15 gallons of wine. 15 gallons of wine would cost $1200 retail at $20/liter. The extra ingredient costs of yeast pectin, etc would be way under $100. Thus, equipment costs aside, the math looks like free wine for life for anyone whose hobby is strawberry wine.
For those smoothie drinkers, they can be frozen for blending with orange juice and a frozen banana. This 30 second classic is a great coffee chaser and energizer.
Picking
Throughout May to October, lettuce was continually harvested and eaten. At times, it would be replaced if it began to bolt or had been excessively picked. It was not uncommon for us to eat over 3 Caesar salads a day.
Once the tomatoes and cucumbers would ripen, there would be months of daily Greek salads.
For more advanced gardeners, we can find instructions to build a vertical garden here.