
Building an elegant vertical garden using stacked pots can be a pleasant experience for years to come. This tutorial will cover the tools and materials to reach that goal.
How To Build A Vertical Garden
In a recent post, we had learned about growing many of our favorite vegetables using a quad pot grow system that is supported with strong pipes. This time around, we get down into the procedure of setting up a vertical garden.
Although the feeding and seasonal overview was discussed, the actual step by step setup was not the focus of the story.
This time around, we will have everything we need to build the system; including a shopping list of system parts, tool list and the actual labour involved.
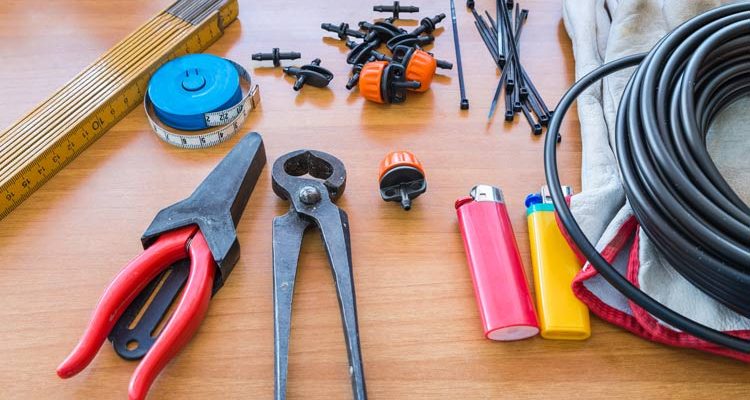
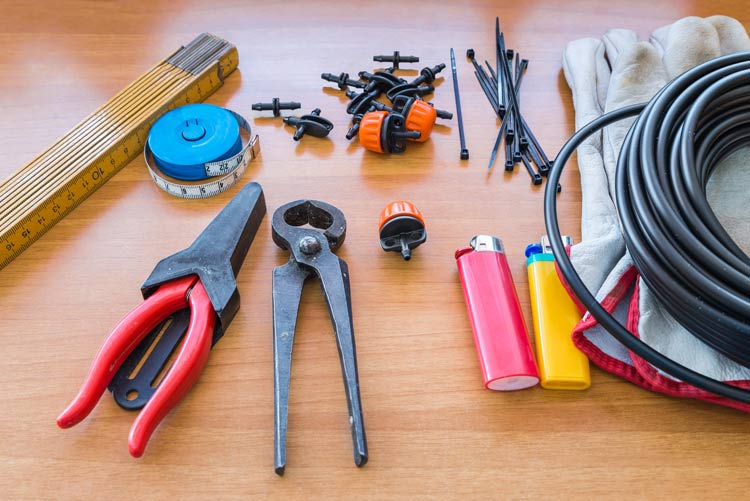
Tools:
• Fence Post Pounder
• Line Punch
• Exacto Knife
• Scissors
• 1-inch holesaw(or 1 inch spade bit), or 1-inch Forstner bit
• Drill
Hydroponic System Setup
Building the system requires about a three-stop shop; pot manufacturer, hardware or home supplies store like Home Depot or Lowes and a hydroponic shop. In some cases, the home supply store could carry most items, but, tubing drippers and a pump can cost significantly more than the hydroponic supplier.
So, without further details, we can now dive right into a 50-pot setup. If we want more than 50 pots, we can just scale accordingly.
To start off, we need to buy the following list of items:
50 quad pots
50-foot role of ½-inch poly tubing
100-foot role of ¼-inch poly tubing
20, 2-gallon per hour drippers
550 gallon per hour pump
55-gallon reservoir
1, ¾-inch thru hull fitting
5, ½-inch pvc elbows
1, ½-inch pvc end cap
10, 8-foot lengths of ¾-inch electrical conduit pipe
10, 18-inch pieces of 1.5-inch schedule 40 pvc
40, 6-7 inch 1-inch pvc spacers for each pot, depending on manufacturer
10, 3-gallon nursery pots
soilless mix or coco coir
10, 1 x 6 wood squares
1 foot of ¾-inch flex hose
Inline Y-filter
20 plant stakes
10, 1-inch pvc Ts
Grow medium like coco coir / coco fibre or soilless mix
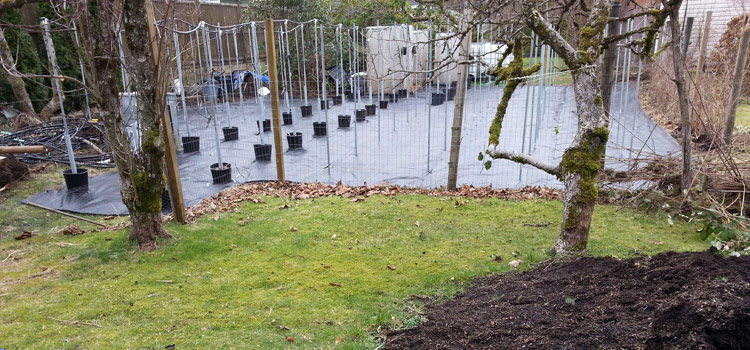
We start by pounding the fence posts two feet deep into the ground at 4-foot spacing. When all is said and done, we will have 2 rows of 5 posts.
Fence post pounding can be as easy as a few pounds in soft soil, or, be a little exhausting in rocky soil. In extreme cases, where we have large rocks underneath, we can use extra tools like a post digger and small, narrow shovel to dig the holes.
If we end up making large holes for the odd pipe, it can feel a little loose as opposed to those pounded in. But, with sufficient water or rainfall, it will become very sturdy.
After that, we take 1×6 wood and cut them into 6-inch squares. A mitre saw works good and quick for this procedure.
After that, we cut holes in the centers of the 1×6 wood and the round 3-gallon pots with a 1-inch holesaw(or spade bit) and put them over the pipe until they are on the bottom, with the wood being first and the pot second. We might not like to hear this, but we must beware of items in the store because not all holesaw sizes from different companies are equal. One could be perfect size and the other is slightly smaller.
Then, the 1.5-inch pvc pipe is placed over top of the steel pipe so it fits on top of the bottom pot and piece of wood. We must keep in mind that mitre saws make perfect cuts for wood and all pvc.
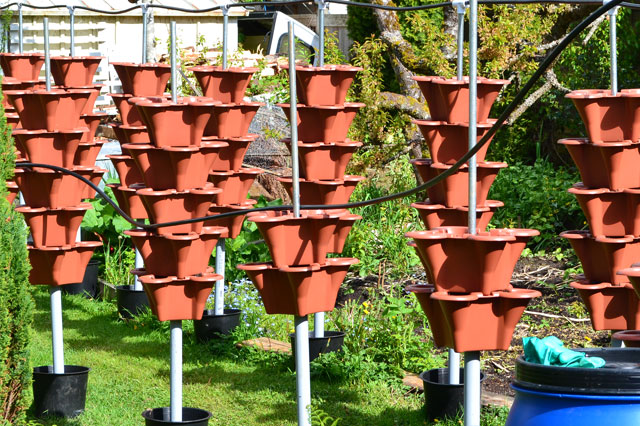
Now, it is time to add the pots. The first pot is strung through the pipe until it lands on top of the 1.5-inch pvc pipe. Larger pots may need spacers between each pot. Thus, we place the 6-7 inch spacers made from 1-inch pvc over the pipe until it goes to the bottom of the pot. The spacer fits at a height so the next stacked pot locks with the one below, yet, has support from the spacer.
After the spacer, we add grow medium to each pot before the next pot is stacked on top. The process is repeated for each pot until the fifth pot on top. Pot #5 will not need a spacer. After repeating this process with each tier, we have a system with pots and medium. Now, we need to set up irrigation.
When it comes to irrigation and the reservoir, we should keep two things in mind; cost and maintenance. For example, blue 55-gallon tanks are a common food grade container that we can pick up for only a few dollars.
But, that 55-gallon tank can be depleted in couple of days when the weather is hot and plants have quite the big thirst and feeding needs. If we extend to 100 pots it will only be sufficient for a single day in the summer heat. We may be thinking that will not work out; especially if we want to take trips or holidays out of town.
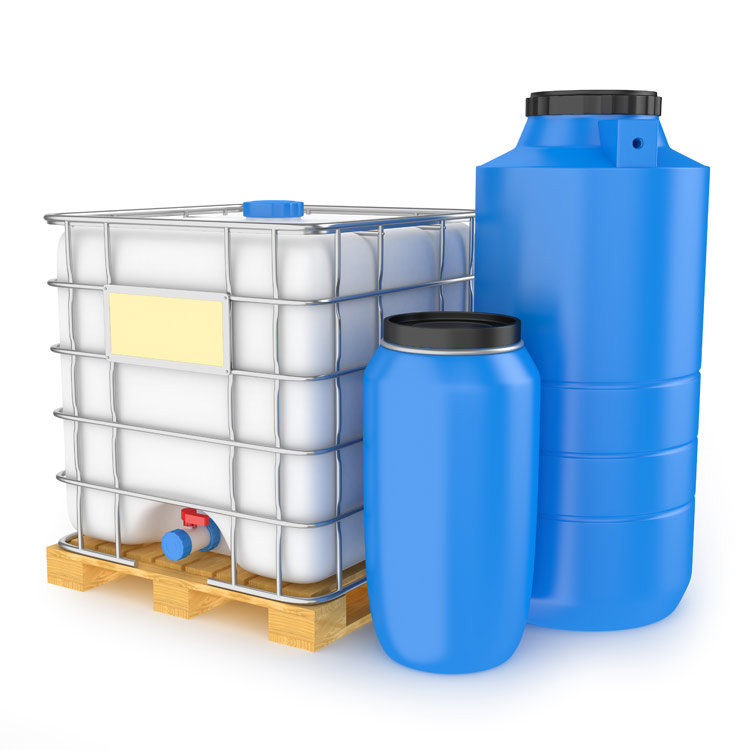
However, there is a real simple solution to that problem if we can handle parting with a few extra dollars. We just go buy a larger tank, say 200-500 gallons to lower our maintenance and give an option like mixing our nutrient weekly, or even every couple of weeks if we want to take off on vacation. In a nutshell, doing it this way can reduce any maintenance to just picking food to eat when we want it.
Although the larger tanks cost more, they too often had an original purpose to haul food grade items and can be purchased at a decent price; especially when they are ‘used’ merchandise.
Another option to using one bigger tank is to connect multiple 55-gallon tanks in series using ¾-inch thru-hull fittings and ¾-inch tubing. We just make sure the o-rings and washers are in good shape and all fittings are leak-free.
Now, take the blue tank and move it to one end between both pipes. Then, we cut a hole near the top of the tank and insert a thru-hull fitting with the extended end outside the tank. Afterwards, we take ½-inch tubing and connect the pump to it with a ½-inch pvc elbow at the far end from the pump.
After that, attach another piece of ½-inch tubing is attached to the elbow on one end runs through a tight hole.
On the outside of the reservoir, we attach an inline filter. This is a key, or dripper clogs will likely be an issue sometime down the road.
Now, we add ½-inch hose to the filter until it reaches the top of the first steel pipe and run it through ¾-inch pvc elbows that are on the tops of each row of pipe. Then, we add another elbow at the end of the first line for which we connect to another run a long line of ½-inch pvc along the top and through 1-inch pvc Ts on row #2. We do this for each row until we come to the end.
To keep it simple, we just need to remember that each row will have a 90 degree pvc fitting on both ends. Alternatively, it could be set up like a manifold, but this setup is easier to build.
Note, if we put the ½-inch Ts over the entire line of tubing(rather than one at a time, setting up the line is a very quick and simple exercise, even with one person(although two is obviously easier).
At the end of the first row we add another ½-inch poly elbow followed by and a single ½-inch poly that runs about 4 feet to the other row. Then, another long line runs through 1-inch pvc Ts that are placed on the tops of the second row of pipes. At the very end(which is back where the tank is) we add a ½-inch pvc end cap. The header line is done.
Finally, two holes are punched in the line above each column and they are filled with ¼-inch barbed fittings that are connected to ¼-inch tubing that runs to the top pot. Wearing gloves and using pliers to insert barbed fittings makes this job an easy experience. Alternatively, we can buy the threaded barbed fittings and screw them in.
As of right now, there are 2 drippers for the top pot. This setup works fine and we will be able to run irrigation until liquid drains out from the bottom quad pot to ensure no pot is without water and nutrient.
At the ends of the ¼-inch lines are a dripper. These lines are supported with plant stakes.
We can leave each column with this basic setup or we can add more lines for better feeding. Keep in mind that as plants grow larger, we may likely find the top pot hogs the nutrient and the lower pots can look a little chlorotic from lack of nutrient. However, chlorosis is unlikely with plants like lettuce and more likely with larger, heavy fruiting plants like bell peppers and tomatoes.
Thus, to ensure each tier is fed properly, we can add a single line to each other quad pot in the stack so that each one receives the same strength solution from the tank. Personally, I would go this route; even though it will require an extra four lines, four barbed fittings, four drippers and four plants stakes per column.
At this stage, we should be able to fill up the nutrient tank, plug in the pump and walk around the garden perimeter to see the drippers delivering the solution as we expect.
If the garden is working perfectly(there is no reason it should not unless the pump is set to low and not creating enough pressure) we can add an outdoor timer to the extension cord, or electrical box so it delivers solution until the bottom pot is receiving solution.
The solution interval can change during the season. For example, during the spring, we may run the timer for 1 hour a day in the morning and another hour during late afternoon. Meanwhile in summer, we may run three time a day, an hour in the morning, 1.5 hours in afternoon and 1 hour in the early evening. When late summer and fall arrives, we may readjust to something like 1 hour when first sun hits the plants and 1.5 hours during late afternoon.
When we are fertilizing our plants, we can use one-part or multi-part formulas. These products come as liquid or powder. Powder plant food is the cost cutting option. Some hydroponic powders come as 1-4 part formulas for which we mix them separately before adding to the tank.
In addition, there are even some fertilizers that work great for vegetative and flowering fruiting for which they will ask to include Calcium Nitrate to the formula to make a complete diet. This is very affordable and the daily cost could be as low as $.50 cents for our 50-pot garden.
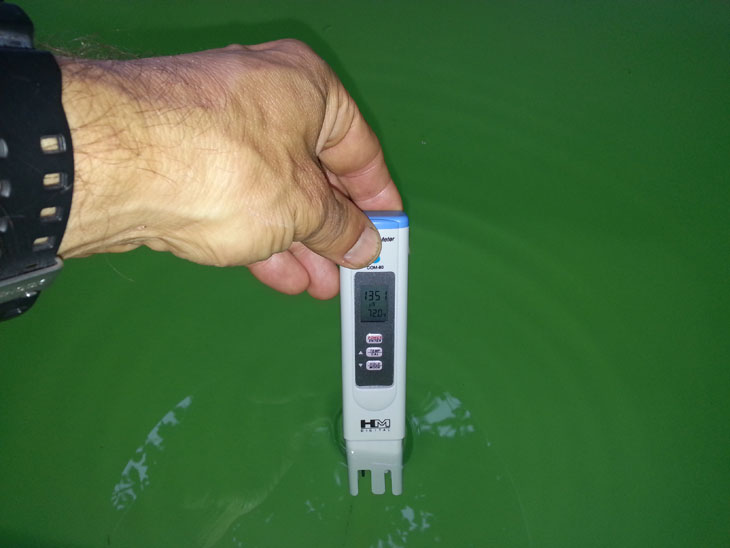
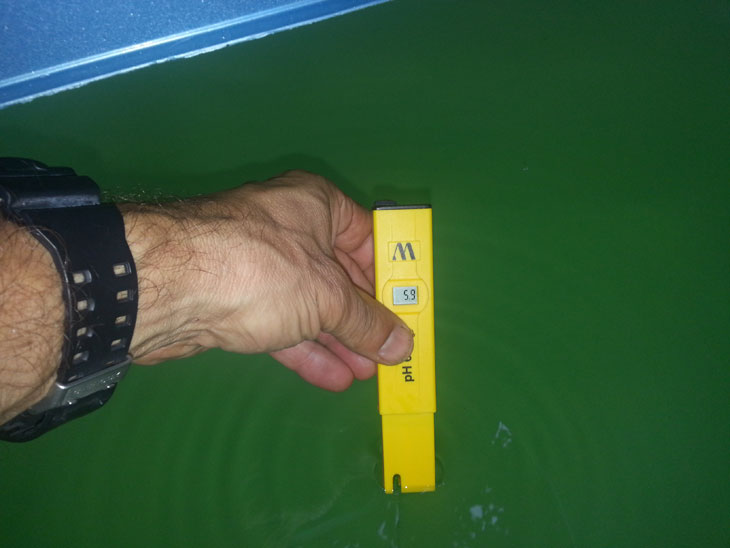
To go one step further, we can buy separate fertilizer salts and mix our own formula. This is the least expensive way to go as we can premix stock solutions and add them to our tank. Once we have a formula that renders about 1500-1800 ppm with a 5.8-6.5 ph, it becomes a simple routine to keep up with a feeding program.

We just keep all power fertilizers in a dry, safe place for they will last for years.
That’s all there is to it.
Conclusion
We now have the tools and techniques to build a garden monitor and view the status from anywhere in the world.
Believe it or not, we can easily make trips out of town and have our daily timer set at the proper feeding intervals and enjoy that long weekend without wondering the unknown.
Happy remote gardening!