
Introduction to Homebrewing
In a blog that mainly discusses healthy growing and eating, a post about learning to brew may seem out of place. But, from a viewpoint of consumption, it is on the level to make a healthier, fresher, craft beer.
For example, homebrew is full of yeast and vitamins, much like the multitude of craft beers out there, and we have complete control to make anything we want, if we get to know our ingredients well enough.
On top of a healthier and fulfilling alternative, the cost per beer can be easily 400% cheaper than the local beer and wine shop down the street.
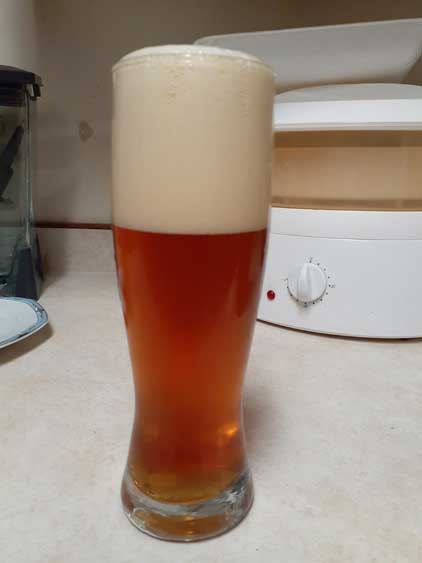
Finally, getting to the point where your homebrew becomes your preferred beer beverage is very rewarding.
Before we get started, we must look ahead and get out of the ‘instant’ mindset because it will be at least 4 weeks before we can taste our first brew. But, with that little patience, we can brew another batch which gets us ahead of the game and into the ‘not going to run out’ game.
Still interested? Well, let’s move on and see how we can achieve these goals.
The Beer Making Equipment
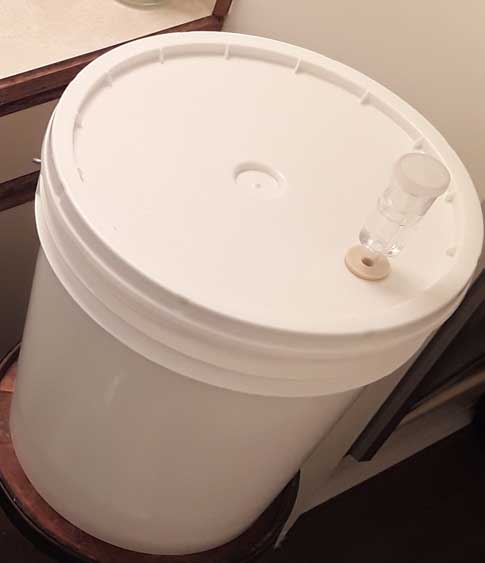
To start with, we can simply buy a beer making kit from our local home brew supply shop(LHBS) for around $100-$150. This kits provide us with a fermenting bucket with airtight lid big enough for 23 litre batches(~5.75 gal), thermometer, hydrometer, airlock or two, racking cane, hose and plastic carboy.
Although the above starter kit gets us up and running, we really should pick up an auto-siphon, bottling wand and a bottle of no-rinse sanitizer(Starsan is great) as well. Working without an auto-siphon is a chore.
Learn To Ferment
Sanitize everything before we begin, or, money and time may be dumped down the drain. For every batch, it is easy to make a .75 litre(quart) amount of liquid with 1/2tsp of Starsan. This link gives a chart. For 3/4 of a litre, all we need is 1.2mL which is roughly a 1/4 teaspoon. One we have our sanitizer, we can use a sponge or sprayer and apply to all the items. For the tubing and auto-siphon, we can wipe and run it through the items.
As an alternative, we can make a no-rinse bleach solution to sanitize everything, or just some items like the hoses and auto-siphon which are easiest to just disassemble and soak.
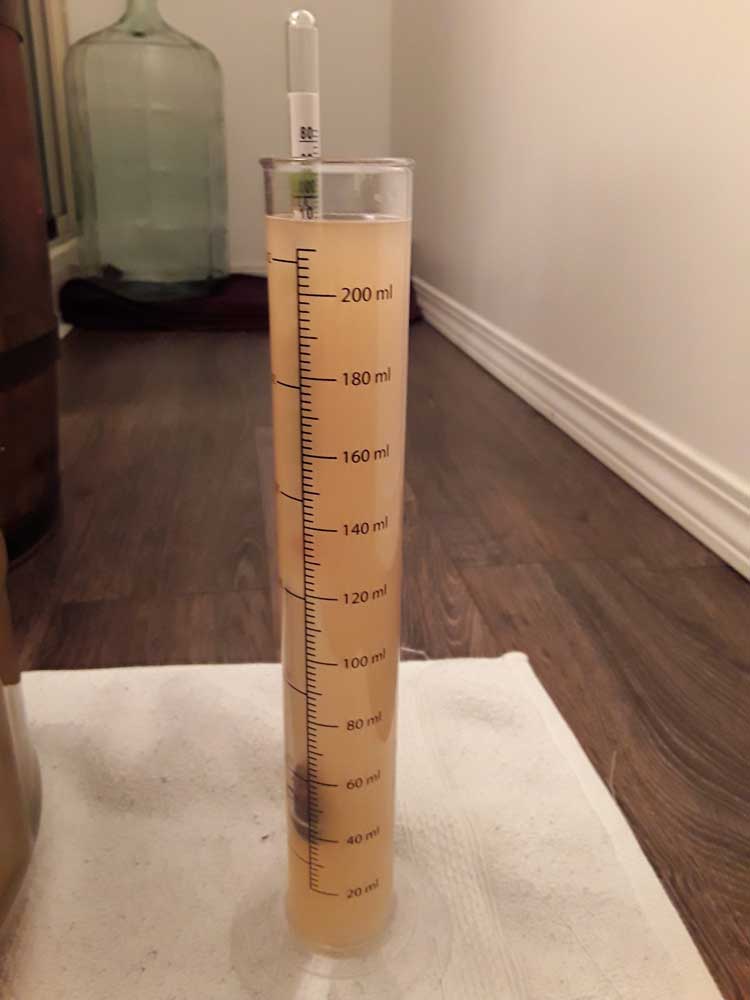
Once we have our items sanitized, we can add the ingredients, water and yeast to our fermenter. For example, we may have Coopers Mexican Cerveza Kit and could mix that along with 2lbs of Pilsen dry malt extract for a 23 liter batch. Once mixed, we can use a graduated cyclinder to take an original gravity(OG) reading which will help us determine our abv after fermentation.
From here, we could just sprinkle the yeast on top, or better yet, rehydrate it for 15-30 minutes in 1 cup of cooled, boiled water around 80 degrees F.
One everything is made, we put on the airlock(filled with no-rinse sanitizer that we made earlier) and leave it for 2 weeks. Normally, within 12-24 hours we will see the airlock bubbling which tells us carbon dioxide is escaping from within the bucket.
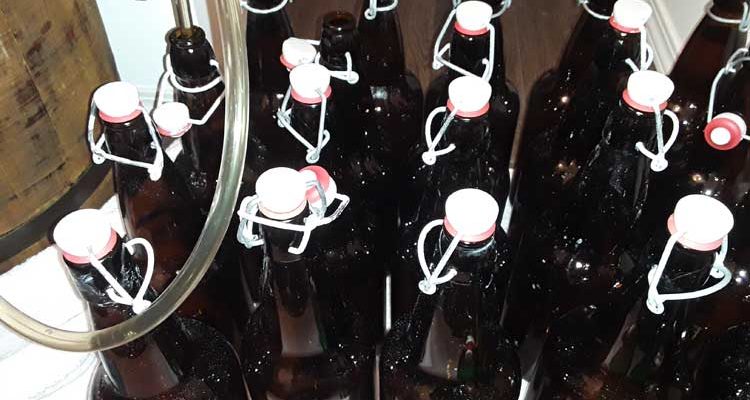
Bottling the Beer
Before we begin to bottle, we need clean and sanitized bottles. Oxyclean(unscented but scented works in a pinch) works great to clean. To sanitize, a Rubbermaid filled with a no-rinse bleach solution, or a dishwasher cycle without detergent using the sanitized feature works.
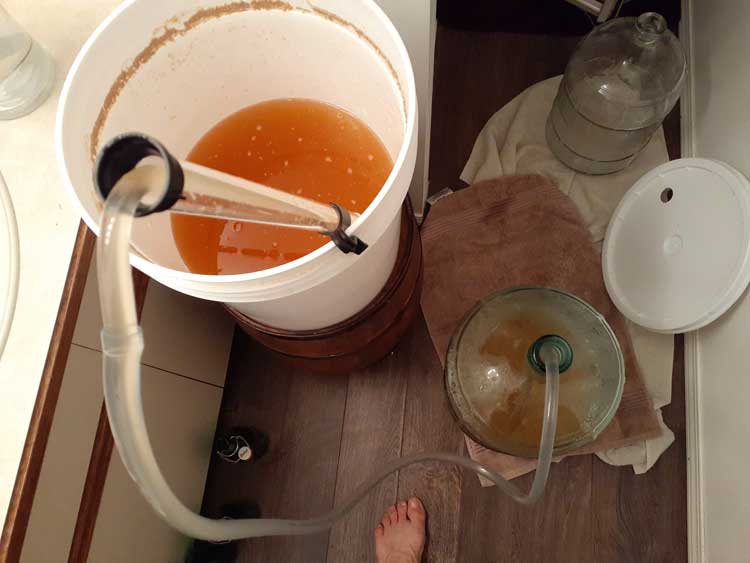
After two weeks, we transfer the beer into a sanitized plastic carboy. Normally, fermentation is done at the point. To make sure, we can take a gravity reading with our hydrometer and graduated cylinder and know for sure it has stopped when the gravity reading is the same two days in a row.
At this point, we transfer a sample and test the FG(final gravity) of the beer to determine the abv.
Then, we make a mixture of 3/4-1 cup of dextrose mixed with 2 cups of slightly cooled, boiled water. Once dissolved, we add that into the carboy and stir slowly. We can wait a few minutes for solution to reach equilibrium too. Normally, when we move the carboy to a higher location than than the bottles and set up the bottles on the floor with a towel underneath them, we eat up that few minutes.
During bottling, especially as a beginner, it is a good idea to have a spare towel handy to clean up any surprise spills.
As it is now time to bottle, we hook up the auto-siphon to the tubing at one end while hooking up the bottling wand to the tubing at the other end. Once we do that, we can insert it into a sanitized bottle and get the siphon action started. One the bottle is full to about 1 inch-1.5 inches below the top, we simply lift the wand and move on to the next bottle.
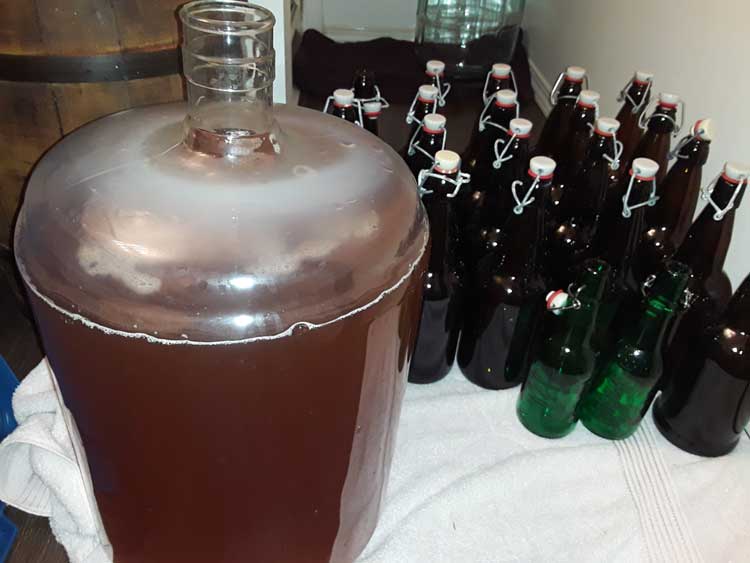
After we fill all the bottles, we can place them into boxes or Rubbermaid containers with secured lids and move them into a location around room temp 70-75 degrees F for 2 weeks.
After that, we can refrigerate them for 2 weeks and practically as long as we want.
Partial Grain and Extract Brewing
Beer kits are a great way to learn the full working process and fermenting of beer. Although kits can make us pleased with making our first palatable beer, the partial grain and extract method requires a bit more work, but, it can lead us in the direction of making a beer to the quality we buy in a store.
The catch is that it takes a little more time. We can think of this method similar to making a pot of soup, adding our stock items at first, then, adding additions at desired intervals.
To make beer this way, we can simply follow one of many recipes. For one, we could tell our local homebrew supply shop the style of beer we like and get a recipe. Or, we could buy a book or two on homebrewing which are filled with recipes.
Once we have our recipe, we simply follow the instructions. Again, this is much like following a soup recipe from a cookbook.
The procedure would go pretty much like this. We would heat water(~1.25 litres-2 gallons) in a 4-5 gallon stock pot until it reaches a temp around 145-156 degrees F for which we then shut off the burner. Then, we add our grains, stir and put the lid on for an hour.
After the hour passes, we strain our grains with a household strainer, and run a few passes of water through them to get all converted sugars. We put all this water back into the pot.
Then, we add water into the pot and bring to a boil. We can use 1/2 or a little more water than the recipe calls for; such as 3-4 gallons.
Once the water boils, we add the dry malt extracts, dextrose, first batch of hops and let it boil for around 50 minutes. After this time elapses, we add our second round of hops and boil another 10 minutes.
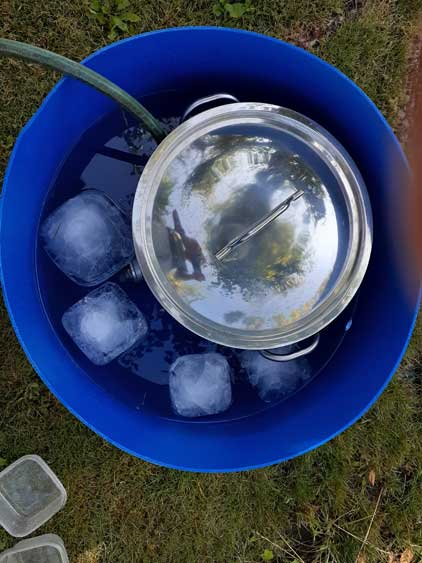
After the 10 minutes is over, we cool the wort in our sink filled with ice water until it is about 75-80 degrees F. After that, we strain the liquid as we dump it into our fermenter.
After that, we top up the fermenter with plain water. We can add boiled, cooled water(75-80 degrees F),or filtered water.
Once we have this method down, moving on to all grain will not be that big of a deal because we have been exposed to grain usage.
All Grain Brewing
All grain brewing is not much harder than partial grain if we use the brew in a bag method. If we are going with a sparge method, the workload doubles.
For simplicity, we will assume we are going with the brew in a bag. Even though it is easier, that does not mean anybody could tell the difference.
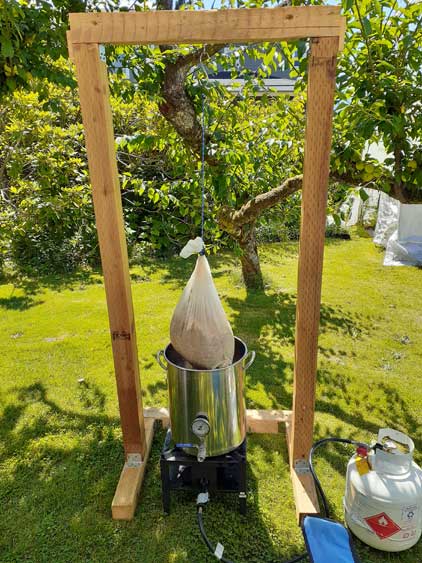
If we do make the jump to all-grain brewing, we will need to invest in more equipment. For the basics, we will need a 10-gallon stock pot, brew bag, 60,000 btu propane burner and a support system. The costs here will be ~$300. But, once we make this investment, we are nano brewers who can brew and modify recipes to make exactly what we want; taste, abv, etc.
Brew in a Bag (BIAB)
Brew in a Bag is a method for which we bring water temperature to approximately 158 degrees F. Then, we immerse our bag of grains into the hot water and cover for 60 minutes.
After 60 minutes, we pull the bag out of the 7.75-8 gallons of liquid and drain fort 5-10 minutes. That bag is heavy which is why we built our support system to hang the bag.
After 5-10 minutes or so, we discard the bag ingredients into the compost and bring the wort to a boil. We don’t add any more water. Once the wort begins to boil, we add our first round of hops. After 45-50 minutes, we add our second round of hops, Irish Moss(if we want) and wait another 10-15 minutes.
Once we complete the boil, we cool the wort to 75-80 degrees F and add to our fermenter.
Like we already know, we add the lid, airlock, yeast and leave for 2 weeks at 70-75 degrees F.
From this point, we bottle and condition for 2 weeks, then store it chilled(if possible).
Conclusion
This guide really sums up the making of world class homebrew. The rest is up to us to keep notes and finetune recipes to satisfy our taste buds.